

🚀 Introduction
In previous blog we have seen that how to host webiste & routing methods in this blog we will see how to add SSL certificate to website.
We'll follow the steps provided below
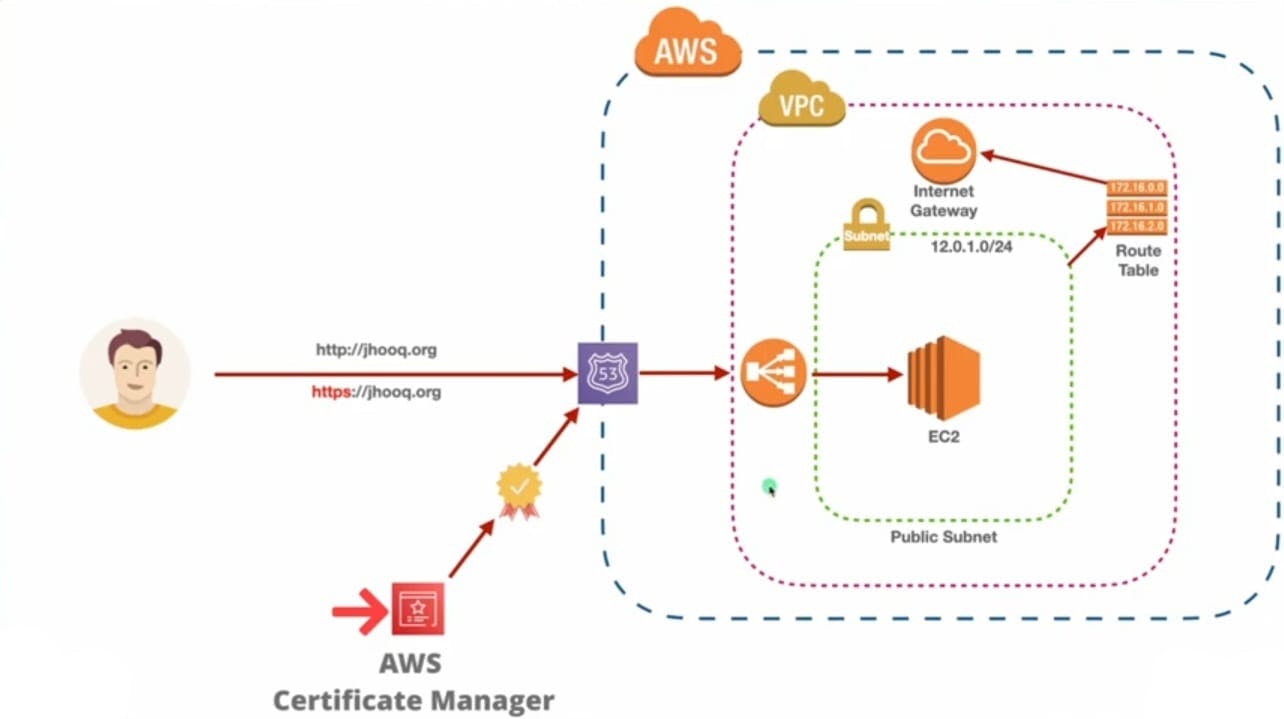
Create VPC
Create 2 subnet
Create internet gateway & attach to VPC
Create route table
Edit subnet association
Select both subnet & save save changes
Edit route -> add route -> 0.0.0.0/0 -> internet gateway -> save changes
Launch EC2 instance
Select VPC that we have created
Add security group -> http -> anywhere
Write this script in user data under advanced details
   #!/bin/bash
   yes | sudo apt update
   yes | sudo apt install nginx
   echo "<h1>Server details</h1>
   <p><strong>Hostname:</strong> $(hostname)</p>
   <p><strong>IP Address: </strong>$(hostname -I | cut -d" " -f1)</p>" > /var/www/html/index.html
   sudo systemctl restart nginx
Create target group -> Select instance -> create target group
Create load balancer
Select application load balancer
Select both subnet
Create security group
Add inbound rule -> http & ssh (anywhere IPv4)
Create Security Group
By domain from website like godaddy, google domain, hostinger or you can also buy domain in route53
After buying domain name now go in route53 -> hosted zone (create hosted zone) -> click on your xyz.com (your domain name) & then create record -> select simple routing -> define simple record
- Choose endpoint (Alias to application & classic load balancer) -> choose region -> choose load balancer -> Create record
Generate Certificate
Go in AWS console & type certificate manager
Request certificate -> Request a public certificate -> select DNS validation -> Select RSA 2048 -> click on request
Click on certificate ID -> Click on Create record in route 53 -> Create record
Now go to the load balancer again & click on load balancer that you have created -> Add listener HTTPS in listeners & rules
HTTPS
Forward to target group
Select target group
From ACM
Select a certificate -> xyz.com (your domain name) ->
And there is default listener HTTP:80, click on that HTTP:80 & click on default after that click on action & click on edit (edit rule like given below)
HTTP
Redirect to URL
HTTPS -> 443
Save changes
Now edit security (beside listeners & rules) there is two security group one is default and another one which we have created, click on that security group & edit inbound rule
Add rule
HTTPS (anywhere IPv4) -> Save rules
Access website using www
In Case, if you're using other domain like example xyz.com then there is again a different name so you need to request a certificate for that particular domain name as well so you need to create a new certificate & there you need to enter the root name as www.xyz.com & request a new certificate for that particular domain as well & then push those record into again to over route53 & then after that you will be able to access the URL using www.xyz.com
In the next blog, we'll see how to attach an SSL certificate using Certbot
Thanks for reading to the end; I hope you gained some knowledge.❤️🙌